
The Easiest Way to Create Webhooks for Your Application

Webhooks are a way to send information from your app to an external app using HTTP. They are different from APIs because they are event-driven. Using an API, your application must continuously poll an app to get info about it. When using a webhook, the external application calls your webhook whenever an event occurs.
This is most easily understood using an example: Let's imagine you have a subscription website that accepts payments using Stripe. You can tell Stripe to call your webhook every time a payment occurs. Your app would then programmatically look through the information Stripe sent you so you could tie it to a subscriber and then activate that subscriber's membership.
The webhook's URL is called an endpoint and would be something like https://yourwebsite.com/stripe-payment-hook
The webhook would require some form of authentication and perhaps even a few security checks — such as checking the originating IP, payload signature, and request headers — to ensure that no one starts activating memberships for users when they haven't paid Stripe!
Why webhooks? Webhooks use cases.
Webhooks are universal. Because they use HTTP, they are also language agnostic. You can implement your webhook using any coding language as long as an HTTP endpoint can be called.
Another name for a webhook is an HTTP callback or, sometimes, HTTP Push API.
GitHub repositories let you specify a webhook endpoint whenever a Pull request gets opened or merged. GitHub sends a POST payload to the endpoint. Then your application can perform actions based on that payload, such as updating an issue tracker or triggering a deployment.
Another example is Zapier: Whenever a particular integration between apps doesn't exist on Zapier, you can resort to webhooks to implement that integration.
Webhooks challenges
Despite how valuable webhooks are in the world of app integration, there are several challenges involved in implementing them. These challenges are significant enough to make developers shun creating webhooks at all. This hinders project growth because other developers need help to easily integrate your service with theirs, which is an excellent way to build momentum in a new project.
One of these challenges is scalability. A webhook that becomes popular quickly must handle sudden usage spikes without crashing the server. That includes building in low latency despite high throughput.
It would be best if you also built fault tolerance. A webhook should be able to recover from downtime and correctly process retried messages.
Webhooks need extensive logging and tracing, both during the development phase and also the production phase. This logging is vital to debug the webhook, but it takes time to implement correctly.
A webhook needs metrics.
Often, a metric needs some data storage mechanism behind it.
And it all needs to be maintained.
The above leads to a long runway before your webhook is production-ready. And then they also need to be tested thoroughly before putting them into a live environment. This runway prevents you from working on your main app; therefore, many developers leave the webhook feature altogether or build something so rudimentary that it doesn't scale and causes more problems than solutions.
Introducing repeat.dev — the easiest way to create all the webhooks you need
I created repeat.dev to handle this. It is a "Webhooks as a Service" application that lets you create, maintain, and debug webhooks for any application. Logging, tracing, metrics, and key-value storage are all built into the system, so you need to program your webhook using JavaScript and repeat.dev takes care of the rest.
Let's look at how repeat.dev makes building fully-fledged and 100% scalable webhooks possible.
The full power of JS and npm
All repeat.dev webhooks are written in either TypeScript or JavaScript, whichever you're most comfortable with.
The editor to create the webhook has full autocomplete built into it to learn the repeat.dev classes are intuitive.
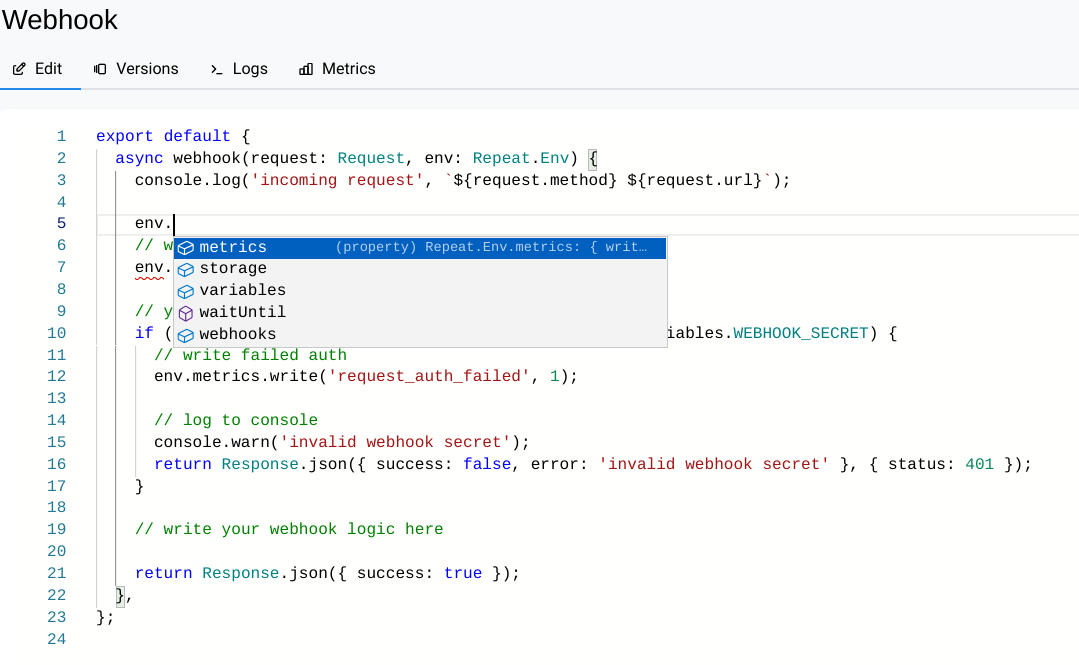
You can code your webhook to use any authentication method - based on the URL, headers, pathname, or posted data.
You can also leverage the full power of JS to make the webhook do anything you want it to. For example, the TypeScript URL class lets you create URL objects. Or you can use the Fetch interface to fetch resources from the Internet.
You can also import any external npm package to make your webhook more powerful. You can look at our demo project to see this in action. We imported honojs, a library that helps with more complex webhooks.
Forwarding your webhook
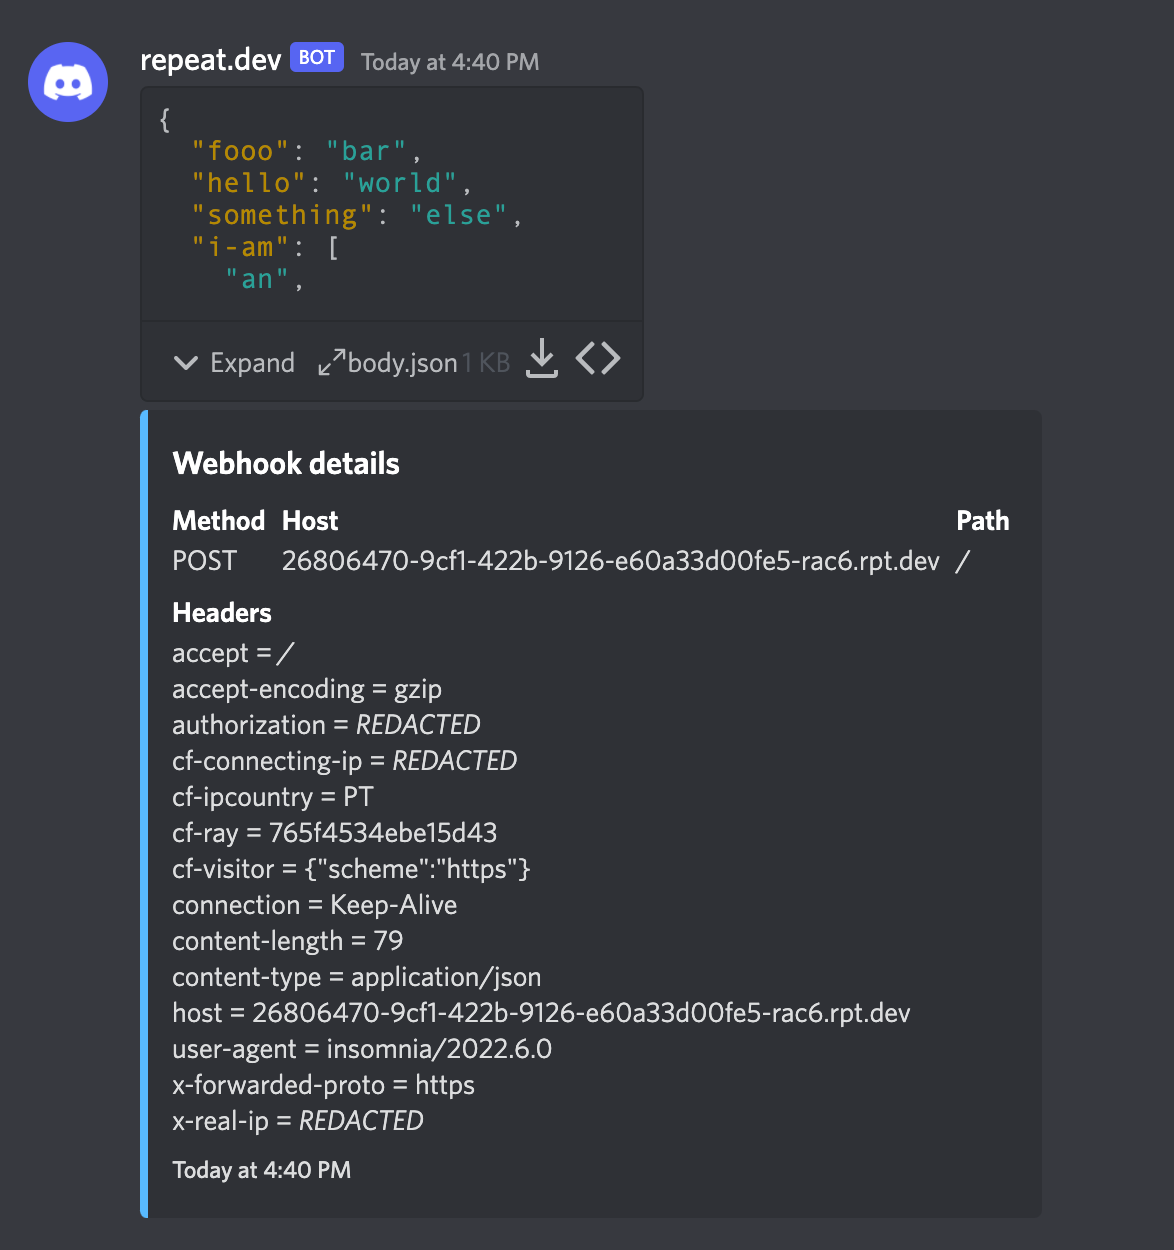
There are many use cases for forwarding webhook data to an external service. One common use case is for use in debugging while testing an integration.
Using the JavaScript fetch API, we can send a webhook's payload to an external service for analysis.
For example, Discord expects payloads to be in a specific format. To get data into this format, we can program our repeat.dev webhook to format the payload and then forward it to Discord. An example of how this was done can be seen here: https://repeat.new/webhook-discord
Webhook logs
Logging is fully built into repeat.dev, and you can log anything you want using the console.log function.
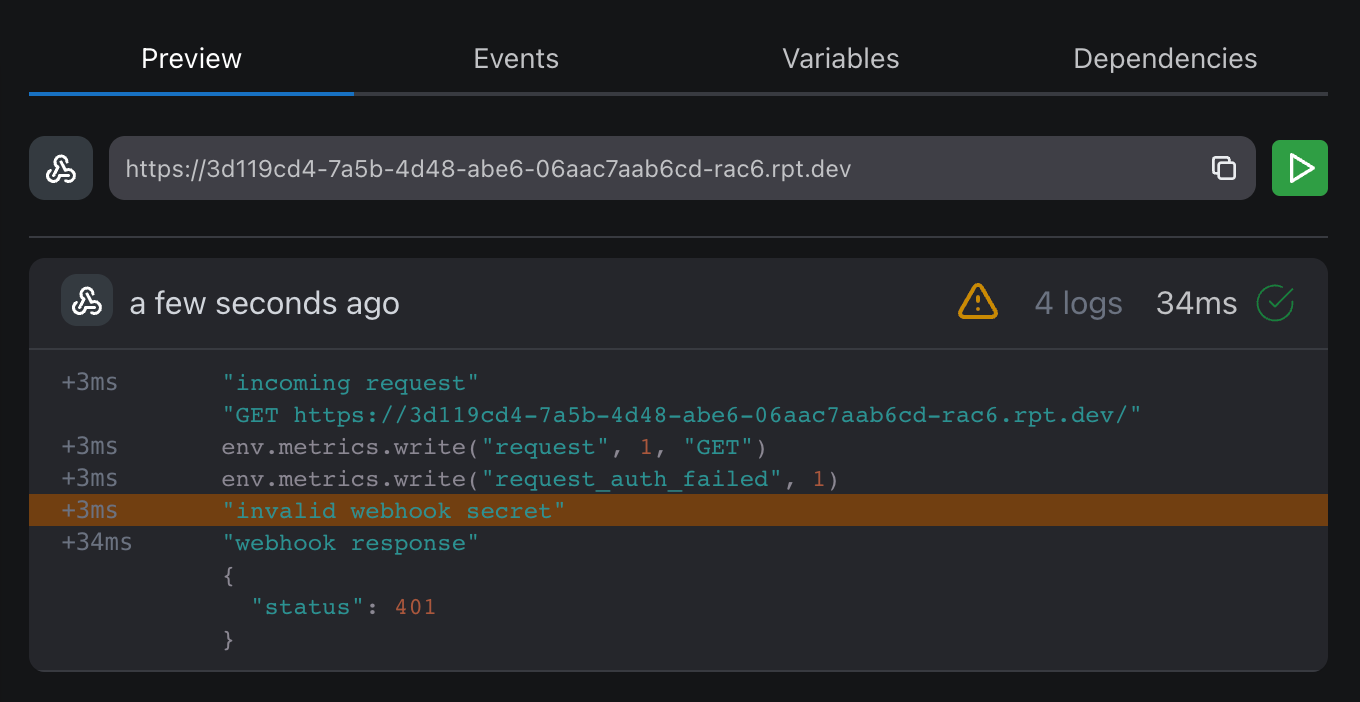
Webhook metrics
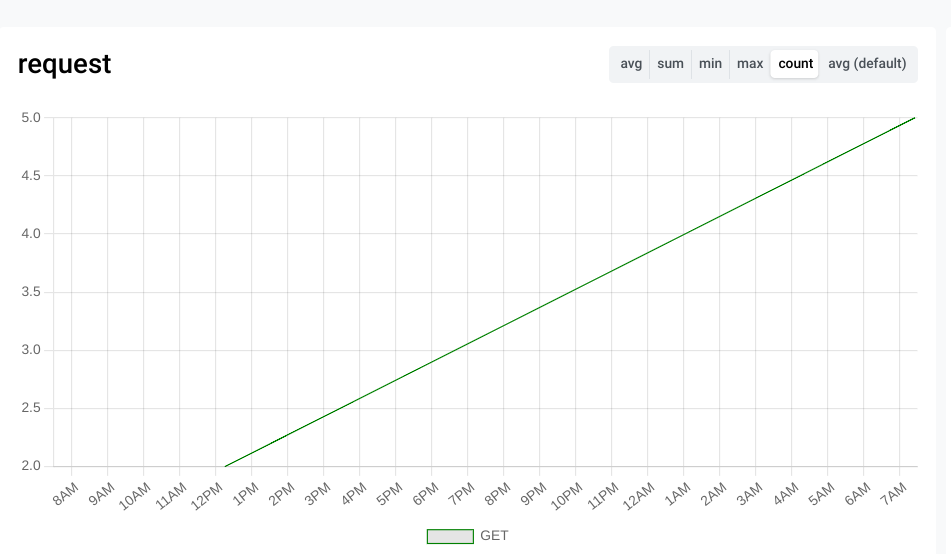
Using the env.metrics.write() function you can include limitless metrics for your webhook.

These metrics are then available to you in the metrics tab, where you can analyze them using avg, sum, count, and other mathematical functions.
These can be aggregated daily, weekly, or monthly.
One potential use case for this is ingesting metrics about the activity of all your GitHub repositories.
Storage
Storage for your webhook exists out of the box on repeat.dev. A built-in key-value storage system can be easily written to and read using built-in functions.
Other events - cron, email
One of the most exciting features of repeat.dev is that it lets you configure scheduled cron jobs and email handlers with the click of a button.
A cron handler handles cron jobs, and this is easily added when you click "New Repeat" followed by "CRON job."
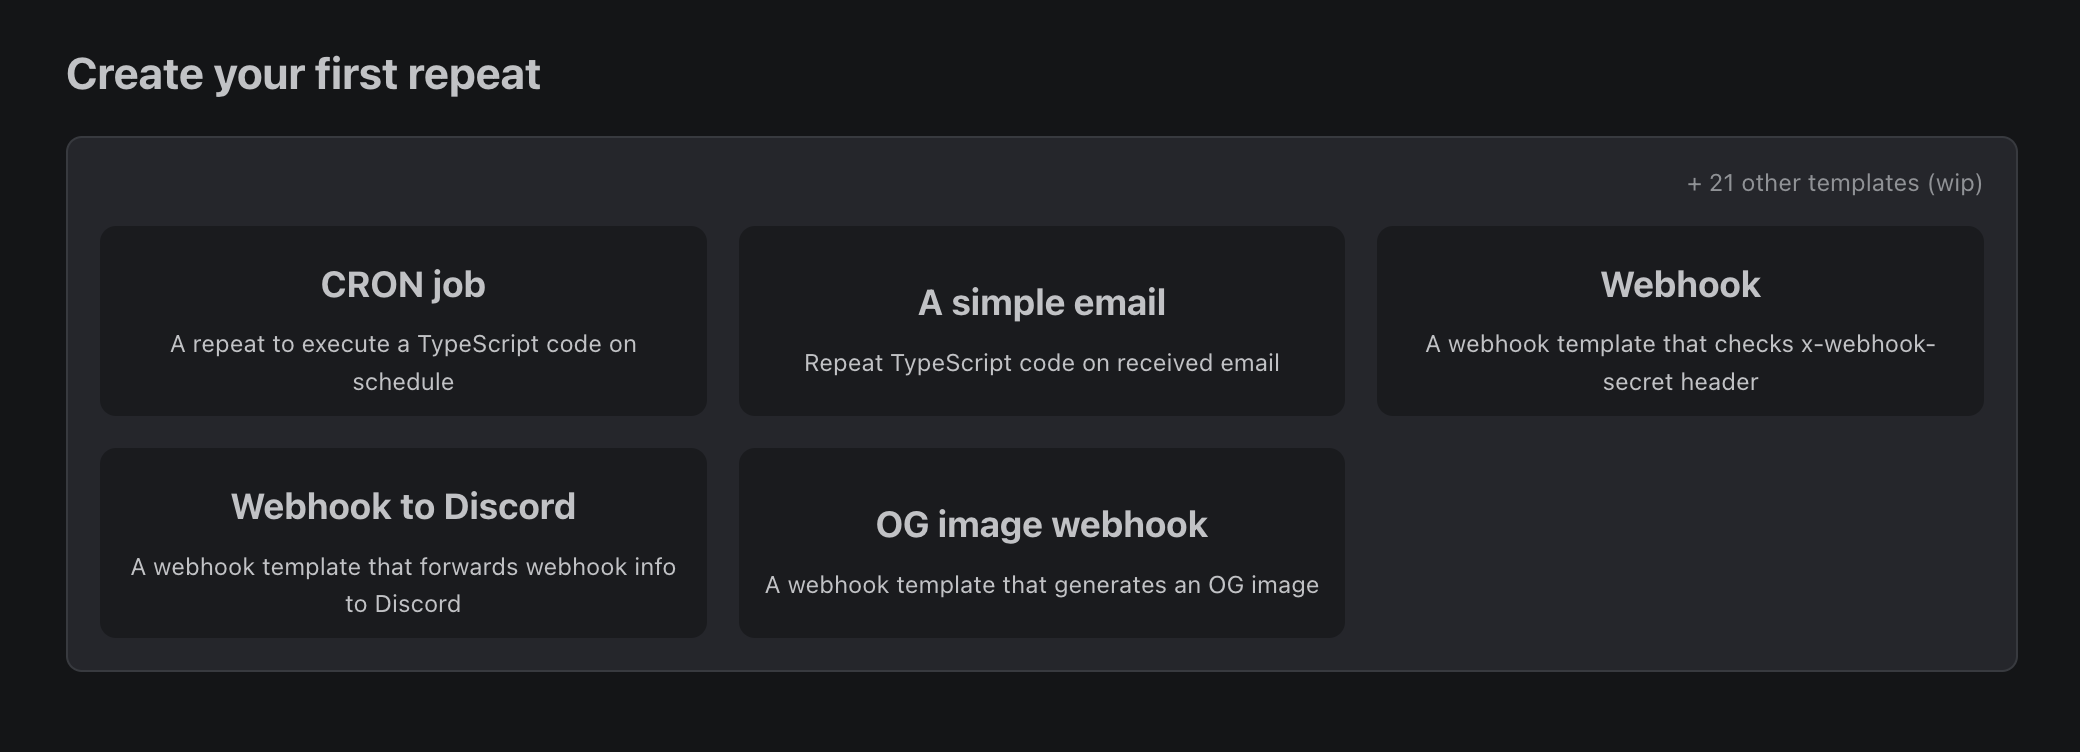
This creates the basic code you will need to program your cron easily.
Repeat.dev is ready to use — for free
Repeat.dev is ready to use and is completely free. In the future, a monthly fee might be charged for extensive use (more than 300 requests a day), which is still a fraction of the cost compared to overcoming all the challenges of creating a webhook from scratch. The service is scalable, robust, and actively maintained. To get started, sign up for a free account here.